Scheduling of Reports and Dashboards
Introduction
Using the Custom Reports scheduler, reports and dashboards can be scheduled by configuring jobs that run in the background.
Using the scheduler, you set up a schedule for generating reports or dashboard with parameters, output options, and notifications:
- Schedule - When to run the scheduled job, and how often
- Parameters - If the report or dashboard was designed with input controls or filters, which parameters the scheduled job will use can be selected.
- Output Options - The name of the output file, the output format and locale, and where the output file is stored
- Notifications - Email options for sending the output to recipients and for sending administrative messages.
This User guide contains the following sections.
- Creating a Schedule
- Viewing the list of Scheduled Jobs
- Changing Schedules
- Pausing a Job
- Deleting a Job
- Running Job in the Background
Creating a Schedule
Schedule
To Create a Schedule, locate the report or dashboard you want to schedule in the repository.
Right-click the report or dashboard and select Schedule...
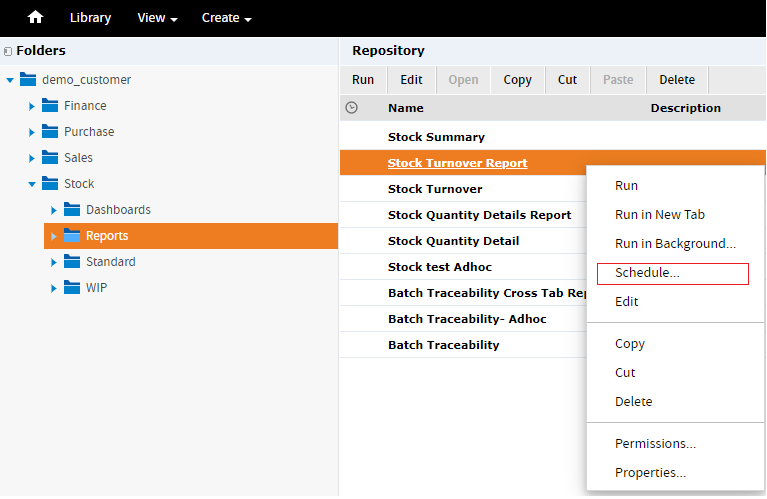
This will take user to scheduled job page. This page allows user to define new job to send email notification or view already configured jobs.
Click Create Schedule. The Schedule tab of the scheduler appears
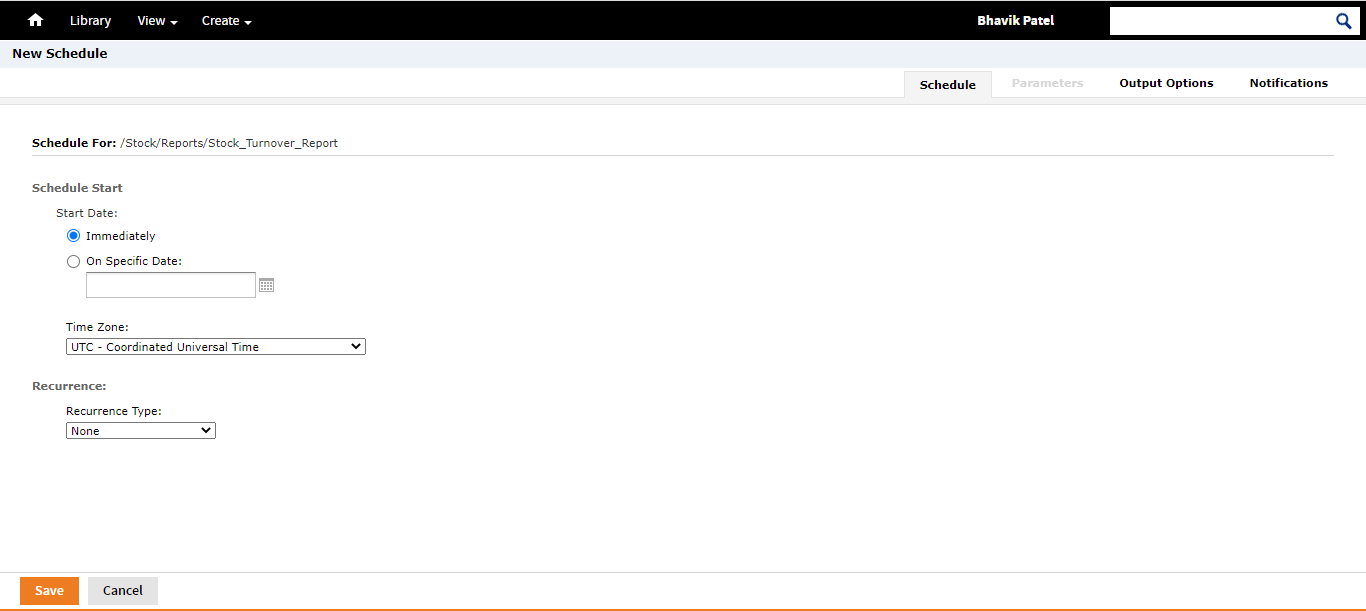
Set a start date, choosing whether to run immediately or on a specific date. If a specific date is selected, click the calendar icon to select a start date and time.
Specify the time zone for the schedule.
Choose a recurrence setting If you select Simple or Calendar Recurrence, additional controls appear on the page.
- None: Run the job once.
- Simple: Schedule the job to recur at a regular interval, specified in minutes, hours, days, or weeks.
- Calendar: Schedule the job to recur on days of the week, days of the month, specific dates, or date ranges.
Simple
Simple recurrence repeatedly runs the job at a regular interval set in minutes, hours, days, or weeks.
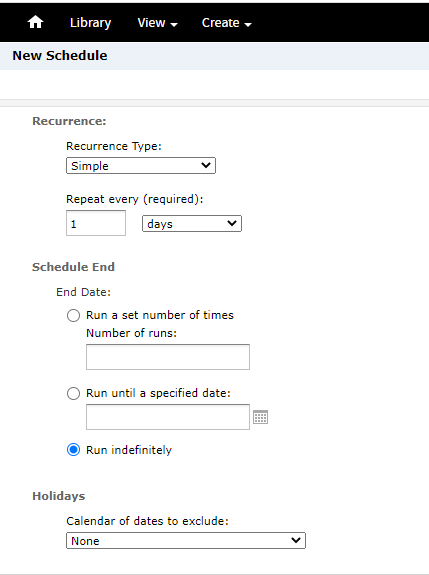
Simple recurrence options are:
- Repeat every – The interval between jobs, in minutes, hours, days, or weeks.
- Run a set number of times – Runs the specified number of times.
- Run until a specified date – Runs until a calendar date is reached. Click the calendar icon to select the date.
- Run indefinitely – Runs at the specified times until you delete the job.
Calendar Recurrence Settings
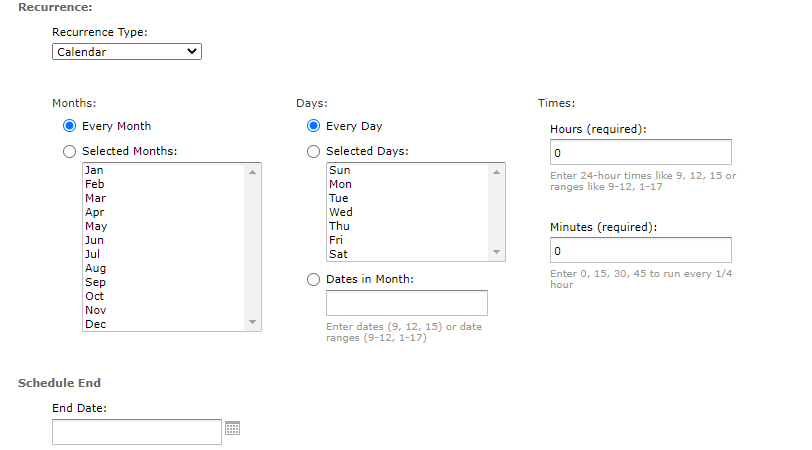
Calendar recurrence options are:
- Months – The months during which the job runs.
- Every Month
- Selected Months
- Days – The days when the job runs.
- Every Day
- Selected Days
- Dates in Months – Enter dates or date ranges separated by commas, for example: 1, 15.
- Times – The time of day in hours and minutes when the job should run. The hours use 24-hour format. You can also enter multiple minutes or hours, and ranges, separated by commas. For example, entering 0,15,30,45 for the minutes, and 9-17 for the hours, runs the report every 15 minutes from 9:00 a.m. to 5:45 p.m. Enter an asterisk (*) to run the job every minute or every hour.
- End Date – Calendar recurrence runs until a calendar date is reached. Click date icon to select the date.
Note:- If a report or dashboard already has a schedule, icon gets displayed against respective report or dashboard. Click the schedule icon, the Scheduled Jobs page appears.

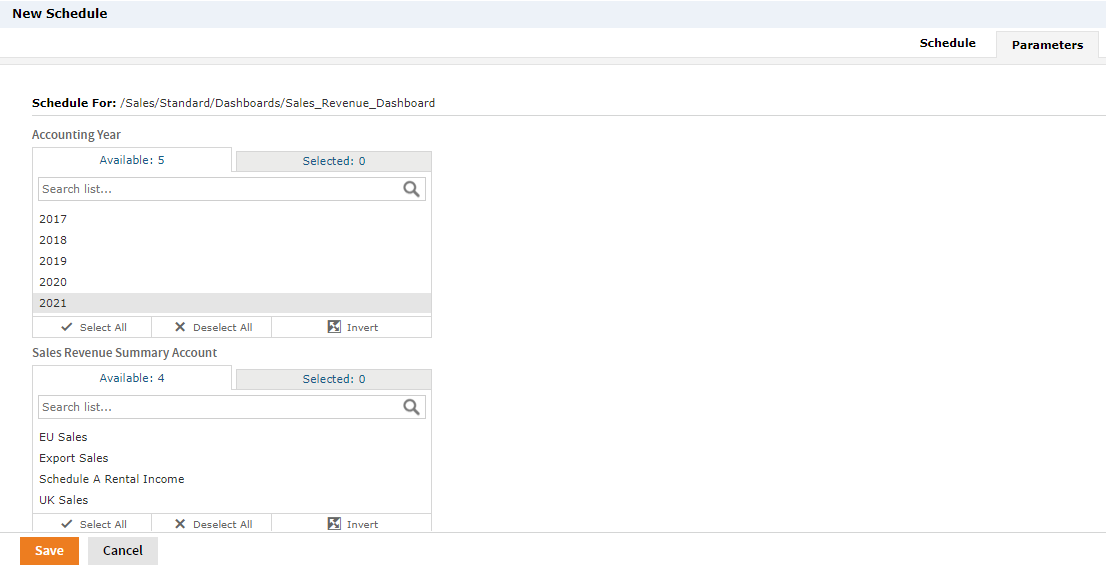
Parameters
If the report or dashboard you are scheduling has input controls or filters added, then it can be used if you want to send notification with attached reports or dashboards for only filtered records.
An input control are graphical widgets that filter the data that appears in a report.The perfect input control limits the data to what you want to send and nothing more.
Setting Output Options
On the Output Options tab, you can change these settings:
- File name – The base name for the output file in the repository. This name must be unique; if you attempt to create a schedule with the same file name as an existing output file, you will not be able to save.
Note:- File name with no spaces is only allowed to save
- Description – The optional description of the file that appears to users who view the repository.
- Time Zone– The output time zone for generating the report.
Note:- Currently the system is taking UTC time zone which doesn't take into account British Summer Time. This means scheduling will happen one hour earlier than defined.
- Output Locale – The locale settings for generating the report.
- Formats – The available output formats. Select one or more formats; the default format is PDF. When you select more than one, each format is stored as a separate file in the selected output destination.
- Canvas Size – Sets the size of the canvas when exporting a dashboard.
- File Handling – Select one or more checkboxes to specify handling for multiple output files with the same name:
- Overwrite Files – Overwrites old output files with newer ones of the same name.
- Sequential File Names by Timestamp – Appends a timestamp to the names of files created by the job. Useful for the output of recurring jobs or for time-sensitive reports where the output must be dated. When the timestamp is used, the output filename is <basename>-<timestamp>.<extension>. Note that, depending on the frequency of the schedule and the format of the timestamp, it may be possible to have two output files with the same name; in this case, modify the timestamp or use the Overwrite Files checkbox to specify the behavior you want.
Notifications
Enter one or more email addresses to send the output after the job has run - To – One or more email addresses separated by commas for sending email notification.
- CC – One or more email addresses separated by commas for sending an email notification on the CC line.
- BCC – One or more email addresses separated by commas for sending blind carbon-copy email notification; the addresses in this field are not revealed to the other recipients.
- Subject – The subject line of the notification email.
- Message – Content of the notification email.
- Choose one of the radio buttons to specify how email recipients access the output:
- Include reports/dashboards as repository links in email body – Sends a link to the output in the repository. Not available unless Output to Repository is selected on the Output Options tab.
- Include report/dashboard files as attachments – Sends the output as attachments to the notification email. If you have selected multiple output formats, each one is attached as a separate file to the email notification.
- Include report/dashboard files as ZIP attachment – Zips all outputs into a single archive file before attaching to the email.
- Include HTML report in email body – Displays the report directly in the email body. This option is available only when Include report files as attachments or Include report files as ZIP attachment is checked and HTML is selected as one of the options on the Output File Options page. When this option is selected, you cannot include a message in the email body. This option is not available for dashboards.
- Do not send emails for empty reports – A check box option that, if checked, prevents the server from attaching empty report output files to email notifications. This applies to parametrized reports where there is no data that matches the parameters. This option is not available for dashboards.
Send job status notifications:
- Send success notification – Check box option that, when checked, sends a notification when the scheduled job runs.
- Success Message – The message in the body of the notification email sent on success.
- Send failure notification – Check box option that, when checked, sends a notification when the scheduled job fails to run.
- Failure Message – The message in the body of the notification email sent on failure.
- Include report/dashboard job information – A check box option that, if selected, includes the report or dashboard's label, ID, description, and job status in the notification email.
- Include stack trace – A check box option that, if selected, includes the stack trace for failed jobs in the body of the email.
Once recipients address and notification details are added, click Save and the Save dialog box appears.
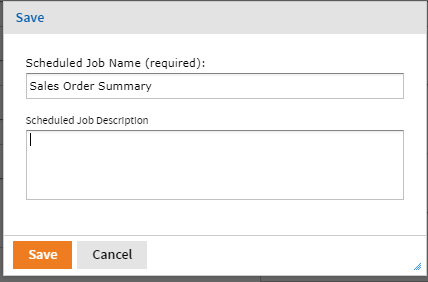
In the Scheduled Job Name field, enter a name for the job, for example, Weekly Report. The description is optional.
Click Save to save the schedule. The job appears in the list of saved jobs for the report or dashboard.

Once State is set to complete, it triggers email to the recipient email address from bcereporting@oneadvanced.com
Note:- bcereporting@oneadvanced.com is only used to send automated emails to recipient email address
Viewing List of Scheduled Jobs
All scheduled jobs that the user has defined appear on the Click View > Schedules page.
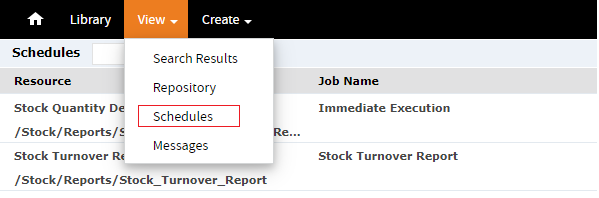
The Schedules page shows the name of the scheduled report or dashboard, the repository URI of the job, the internal ID number of the job, the user (owner) who created the job, and the state of the job. Job states are:
- NORMAL – The job is scheduled.
- EXECUTING – The server is generating the output.
- COMPLETE – The server has finished running the job and placed output to the repository.
- PAUSED– The job has been disabled. Click Enabled to resume the schedule.
- ERROR – The scheduler encountered an error while scheduling or triggering the job. This doesn’t include cases where the job is successfully triggered, but an error occurs while it runs.
- UNKNOWN – The scheduler encountered an error with the job trigger.
Changing Schedules
If the start date for a schedule has not yet passed, you can edit the schedule. Once the start date for a schedule has passed, create a new schedule rather than changing the start date.
To edit a schedule:

- Click View > Schedules.
- Click edit icon in the row of the job you want to change.
- Make the changes on the Schedule, Parameters, Output, and Notifications pages.
- Click Save. The update occurs immediately.
Pausing a Job
To stop a job from running without deleting it, disable the job.
To pause a scheduled job:
- Click View > Schedules.
- In the row of the job you want to stop, uncheck Enabled.
To resume a paused job:
- Click View > Schedules.
- In the row of the job you want to resume, check Enabled. When a stopped job is re-enabled, it waits until the next scheduled time to run.

Deleting a Job
To delete a scheduled job:
- Click View > Schedules
- In the row of the job you want to delete, click delete icon.
Running a job in the background
Running a job in the background is equivalent to scheduling it to run immediately without recurrence.
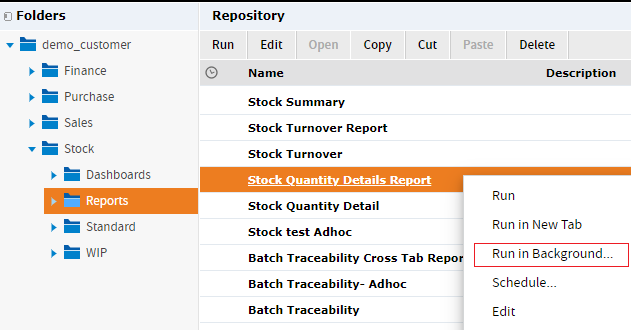
To run a job in the background:
- Locate the report or dashboard you want to run in the background.
- Right-click the report or dashboard and select Run in Background from the context menu.
- Set the output format and location, as described in Setting output options , the output is saved in the repository.
- Set Notifications and click save. The job begins to run immediately.