Importing a Chart of Accounts

Importing - Chart of Accounts
There are two options that can be used to import a chart of accounts:
Setup Wizard
Import Accounts
Whilst both options perform the same function, typically the setup wizard is used for new users’ migrating to BCE and import accounts is expected to be used by existing BCE users who need to introduce new summary accounts and accounts to their existing system.
Importing the chart of accounts is performed as follows:
Setup Wizard
From the BCE title bar, click on the cog icon and select ‘Setup Wizard’ from the dropdown list:

This opens the following screen, where ‘Chart of Accounts’ is displayed as one of the steps for setting up BCE.
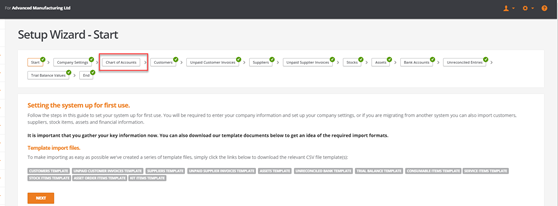
Click on Chart of Accounts to open the following screen:
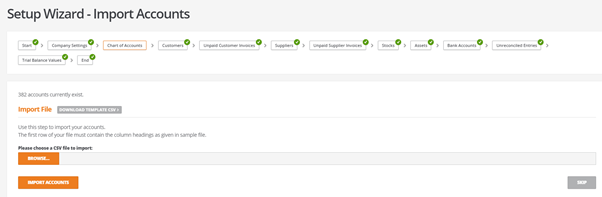
Import Accounts
From the ‘Admin’ menu option select ‘Chart of Accounts’.
Access to the admin menu is available to user’s who have been granted system administrative permissions to their BCE accounts system.

Selecting ‘Chart of Accounts’ opens the following screen:
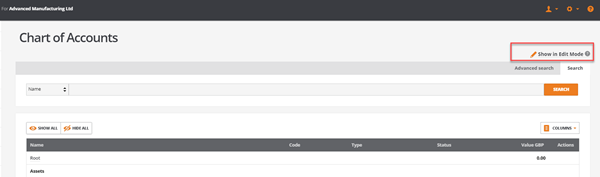
The chart of accounts initially opens in view mode, select ‘Show in Edit Mode’ to switch to the maintenance mode that will display the following menu options:
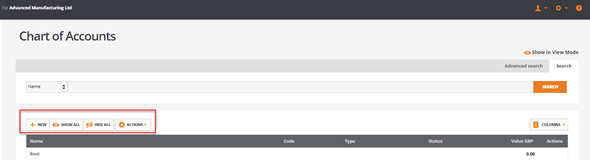
Click on ‘Actions’ and select ‘Import Accounts’ to open the following screen:
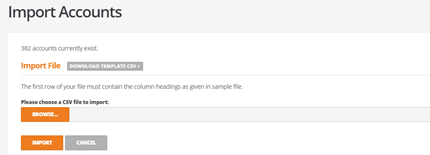
BCE Import Template
The import template is a csv format file that is downloaded and completed offline.
Click on ‘Download Template CSV’ to download the file:
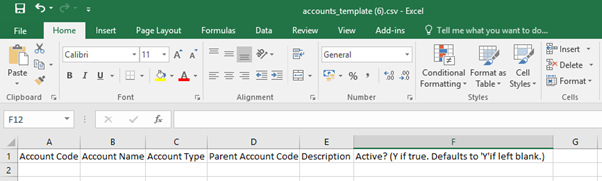
Complete the template fields as follows:
Account Code:
Unique alpha/numeric code (max 9 characters)
Account Name:
Alpha/numeric name (max 150 characters)
Account Type:
Enter the correct account type:
For Balance Sheet items:
- New summary headings, select type ‘Summary’
- New balance sheet accounts, select type ‘BalanceSheet’
For Profit & Loss items:
- New summary headings, select type ‘Summary’
- New P&L revenue accounts, select type ‘Revenue’
- New P&L expense accounts, select type ‘Expense’
Parent Account Code:
For sub heading summary accounts and accounts enter their parent summary account
Description:
A description can be entered as required. To provide supporting text to describe the purpose of the account to the user
Active?
Imported accounts default to active where the field is blank or contains the letter ’Y’
If the field is set to ‘N’, the account is imported and set to a status of inactive
Inactive accounts are not visible for selection when adding new documents but will remain visible in the chart of accounts and will retain any existing balances.
Importing the Template
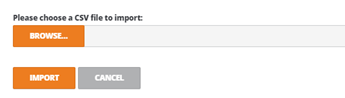
From ‘Import Accounts’, select the ‘Browse…’ button to locate the csv file to import:
Locate the csv file from the directory structure and click on ‘Open’:
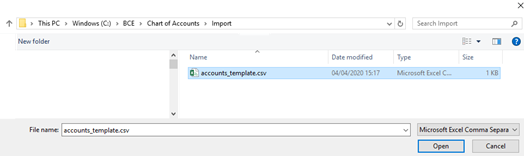
This will populate the ‘Browse…’ path with the selected file
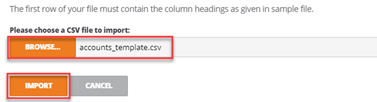
Click on the Import button to open the ‘Preview- Import Accounts’ screen:
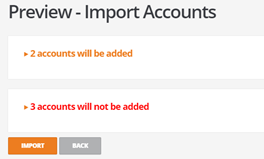
The preview screen indicates which of the import lines will be successful and unsuccessful before committing them to the live system.
Click on the ‘# accounts to be added’ line to preview the new accounts and their position within the chart of accounts:
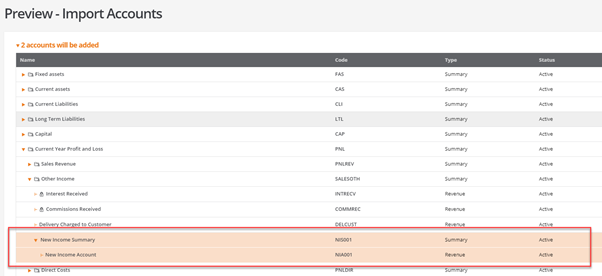
The new accounts are highlighted within the chart of accounts to confirm and validate their position to the user.
Click on the ‘# accounts will not be added’ line to review the reasons why the new accounts will not be added to the chart of accounts:
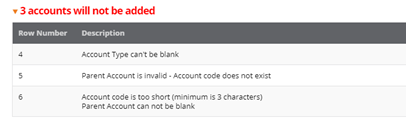
Each of the row numbers will be identified with their corresponding reason why the accounts cannot be added. The user may choose to cancel the import accounts and correct the problem entries from the csv file before rerunning the import accounts.
Once satisfied all the accounts are correct, click the ‘Import’ button to import the new accounts. When the import task is completed, the system will indicate the ‘Import Results’
This completes the import of the new accounts