Expense Claims
Introduction
Business Cloud Essentials allows expense claims for employees to be created.
Expense Claims
To create an expense claim, from the Employees menu select Expense Claims.
From the expense claim page a list of all expense claims are displayed showing the employee names and whether the expense has been paid, is on hold, the invoice date and value.

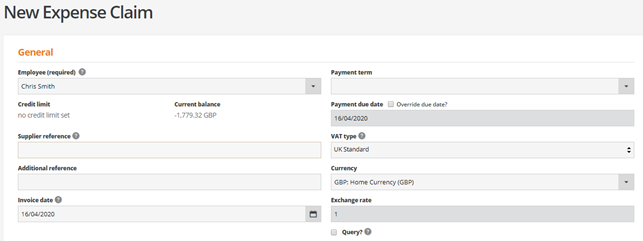
Select New expense claim at the top of the page.
Select the employee and enter a supplier reference if applicable, this could be an order or invoice number or drawing number etc.
Enter an additional reference, payment due date and invoice date as required.
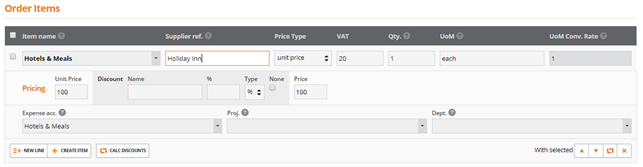
To set up an expense claim you must also select an order item.
If you do not have one set up you can create one by selecting Create Item in the order section.
Select the item, and enter the quantity and price details.
You will need to select an expense account, which will be the account where you want costs from this claim to be accumulated.
You can select a project or department against the claim as required.
Once you are happy with the details, press next and you will be taken to the next page where you will see the expense claim. You will see you have the option to edit this as once saved it cannot be edited, only rejected then resubmitted.
You will see the employee’s details as well as the items and total claim amount. You can save this or print and will see a box where you will be required to authorise this claim. Once saved you can see the claim on the expense claim page. When you come to do a payment to the employee, you will find the expense claim there ready to be paid.
Actions
On the expense claim page, if you select actions you can see that you can disallow expense claims. If you select an expense claim and disallow it will be the same process and format as if creating a credit note. You can also select expense claims to print.
